Tuesday, May 29, 2012

Bake 52: Week 22

This is my week to host!
Last time I hosted I didn't really introduce myself, so I'll start with that...
A couple of (maybe) unknown facts about me:
*I grew up in Price, Utah (thus how I know Amanda and became part of this group.  Actually she, Jenn Z. and I went to school together from kindergarten to graduation!)
*I now live in Eagle Mountain and am the proud mommy of four - two boys and two girls - in that order.
*My oldest is 8 and my youngest recently turned 1.  They keep me busy! They really love being my "test monkeys" for this baking group!
*I love to shoot guns and am working on getting my Concealed Carry Permit.
*Tony Parker (San Antonio Spurs) landed on my lap at a Jazz game once. Just sayin'...
*I love horror movies.
*I can never think of fun facts about myself when I am trying.
*I enjoy reading, cooking, crafts, shopping, photography, and spending time with my family.
*I have been married almost 11 years and my husband is an Illustrator.  Which is ironic, because I can't even draw stick figures.  I'm not kidding! Maybe I can't draw, but he can't bake...so... onto the recipe!
I chose to make the 
RUSTIC CARAMELIZED ONION TART WITH BLUE CHEESE AND WALNUTS.
 I'm really hoping that this sounded good to someone besides me...I know it's a strange pick in a book full of delicious baked goods, but when I came across it I knew that I simply had to try.  And I'm glad I did! I really loved the combination of these flavors together!

Rustic Caramelized Onion Tarts with Blue Cheese and Walnuts:
The America's Test Kitchen Family Baking Book pgs. 422-423
Makes two 14 by 8-inch tarts
Serves 6-8
These tarts are not made in a tart pan; instead they're baked free-form for a rustic appearance.  Note that the parchment paper is a must for this recipe.  You can either make your own pizza dough, use store-bought dough, or buy some from your favorite local pizzeria.  You will need about 3 tablespoons of additional oil for brushing.

2 tablespoons extra-virgin olive oil, plus extra for brushing
2 pounds onions (about 4), halved and sliced 1/4 inch thick
1 teaspoon brown sugar
1 pound pizza dough (see note above)*
Pepper
1 cup (4 ounces) walnuts, toasted and chopped coarse
1 cup blue cheese, crumbled (4 ounces)
2 scallions, sliced thin
*I used the Basic Pizza Dough from the book - you can get the recipe on Betsy's Blog

1. Adjust an oven rack to the lower-middle position, place a baking stone on the rack, and heat the oven to 500 degrees.  Let the baking stone heat for at least 30 minutes (but no longer than an hour).

2. Heat the 2 tablespoons of oil in a medium nonstick skillet over medium-low heat until shimmering.  Stir in the onions, brown sugar, and salt.  Cover and cook, stirring occasionally, until the onions are softened and have released their juices, about 10 minutes.  Remove the lid, increase the heat to medium-high, and continue to cook, stirring often, until the onions are deeply browned, 10 to 15 minutes.
 Test Kitchen Tip:  Caramelizing Onions
The most important part of this tart is proper caramelization of the onions.  We had to take a good look at how best to caramelize them.  Most recipes subscribe to one of two methods - low and slow or fast and furious-yet neither works.  Low heat and slow cooking dries out the onions before they have a chance to darken, while cooking fast over high heat leaves the onions crunchy and burnt tasting. The solution? A combination of low and high heat.  We started the onions over medium-low heat so that they released their juices and softened and then increased the heat to medium-high until they become caramelized.  Also, a nonstick skillet works best for caramelizing-the slippery surface ensures that no caramelized bits are left in the pan.

 3. Turn the dough out onto a lightly floured counter, divide it into 2 equal pieces, and cover with greased plastic wrap.  Working with one piece of dough at a time (keep the other piece covered), press and roll the dough into a 14 by 8-inch oval on a lightly floured counter.  Transfer the dough to a piece of parchment paper and reshape as needed.  Gently dimple the surface of the dough with your fingertips.

 4. Brush the dough liberally with additional oil and season with pepper.  Scatter half of the caramelized onions, walnuts, and blue cheese evenly over the tart, leaving a 1/2-inch border around the edge.  Slide the parchment paper and tart onto a rimless (or inverted) baking sheet, then slide the tart (still on the parchment) onto the hot baking stone.
With the caramelized onions...
and the walnuts...
and the blue cheese
5. Bake until the tart is deep golden brown, about 10 minutes, rotating it halfway through baking.  (Prepare the second tart while the first bakes.)  Remove the tart from the oven by sliding the parchment paper back onto the baking sheet.  Discard the parchment paper, slide the tart onto a cutting board, and sprinkle with the half of the scallions.  Let the stone reheat for 5 minutes before baking the second tart.  Serve warm.
Right out of the oven
and with the scallions, which are really green onions.  Who knew?
 Yum! I was the only one in my house that actually liked this...oh well, more for me!
Hope you all enjoyed it!

Wednesday, May 23, 2012

Bake 52: Week 21

This week we baked
Multigrain Bread
 Bread. Why bake bread when I know it won't turn out great? AND multigrain bread? I like to say that I like healthy bread. I figure if I say it enough I will start to like it. But it just tastes too...healthy. Not really my thing.  You could probably guess I wasn't super excited to try this bread, right?
This is why Bake 52 is genius! I would NEVER have chosen to make this bread - but I LOVED it! It didn't have that overly wheaty taste.  It was light and soft and everything that you want homemade bread to be.  Plus healthy! SO YUMMY!
The dough rose really well and I was thrilled when I took the bread out of the oven, it was BEAUTIFUL!
I tried this plain, with butter and jam, and as sandwich bread - it was perfect all three ways! I will definitely be making this again.  Thanks to Jennifer for hosting and making me try something different.
Hey, different IS good.
Check out her blog for the recipe!

Wednesday, May 16, 2012

Bake 52: Week 20

This week's pick was
French Macaroons
I have never made (or eaten) a Macaroon cookie that wasn't made out of coconut - I guess this is how they roll in France.  Bonus of this pick is that it is a gluten-free cookie that uses almond flour.  My husband was super excited about this!  And he LOVED these! He is already asking when I will make them again.  They are a meringue-type sandwich cookie (though not as airy) with a butter-cream frosting in the middle. I liked the nutty flavor that the almond flour gave them. I thought these cookies were really good - of course can't compare to a good old chocolate chip cookie, but for something new and different, I did enjoy them.  My kids also really liked them, so it was a great pick for my family! 
 It looks like we will be baking these again!  
Check out Betsy's Blog for the recipe!

Wednesday, May 9, 2012

Bake 52: Week 19

This week we baked
New York-Style Crumb Cake
This recipe looked good when I checked it out.  In my mind I thought "OK, we are going to make a coffee cake".  Then for some reason I decided to try and figure out why this is New York-Style and not just Crumb Cake.  Well, I honestly don't know, other than they say the first recipe came from Germany to an ancestor in New York and that's where it started...as you can tell I didn't research too hard.  HOWEVER, I did find out that you NEVER confuse a coffee cake and a crumb cake! Why?  The crumbs, I guess.  Apparently it is offensive.  Glad I know now!
Anyway...this cake was delicious!  Not too sweet or rich, but moist, sweet enough and seriously addicting!! I couldn't stop eating it. I really like cakes with this cinnamon flavor, but have never made a crumb (or coffee) cake.  So glad we tried this, I will definitely make again. Would be fun to take to a breakfast or brunch! 
Check out the recipe on Jenn's Blog!

Wednesday, May 2, 2012

Bake 52: Week 18

Classic Pancakes with Berry Maple Syrup
These pancakes were delicious.  Not one of those recipes that makes me commit to only using this recipe from now on, but they were definitely light and fluffy and delicious - enjoyed by everyone.  I did like the tips of making the perfectly cooked pancake. I also liked the syrup - again, nothing to write home about, but still very good.  I didn't get many pictures, because making them went something like this:  First off - I'm not a huge breakfast fan, I only cook breakfast for dinner. So it was dinner time, the kids were starving, I was trying to get them to do their homework and they wouldn't sit down, my baby was sitting on the floor holding my legs crying to be held, I had two pans of pancakes going (this one and another one with gluten-free pancakes) and bacon in another.  Oh, did I mention I was also cooking the syrup?  Yes, using all 4 burners at once (my pancake griddle broke).  I felt super lucky to even get a pictures of these before they were devoured!  Check out the recipe on Jesse's Blog!

Wednesday, April 25, 2012

Bake 52: Week 17

This week Talesha's pick was Baklava!
 I was super excited for this week.  Any mention of Baklava brings back fond memories of the Greek Festival we had in Price every year growing up. I never imagined that was something I could make - that was just something you buy!   It was so fun to see how it is actually put together. 
After LOTS of layers of phyllo dough and LOTS and LOTS of butter, some nuts, cinnamon, cloves and a honey syrup, here is the Baklava.  It was absolutely delicious!
Check out the recipe on Talesha's Blog!

Wednesday, April 18, 2012

Bake 52: Week 16


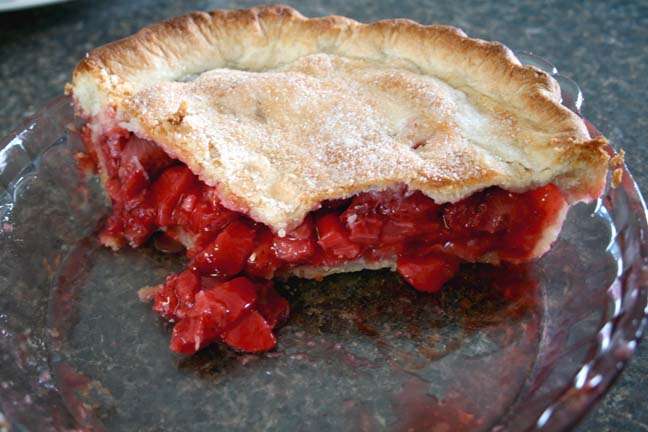
This week we baked Strawberry Rhubarb Pie.  Only I couldn't find any rhubarb at the stores yet, so I baked a Strawberry Pie! I don't think I've ever had a baked strawberry pie - only the cold ones, you know, with all the red gelatin around the strawberries in an already made crust? Yep, that one.  Well I was dying to have a strawberry pie in a real pie crust so I was really excited for this week.

I loved that I finally learned how to make the edges of the pie pretty - and it was so much easier than I have always thought! However, I wish I would have sealed the edges better because some of the filling leaked out during baking - just added a little color though, nothing too devastating.

The recipe also had you soak the strawberries and sugar for an hour to let the extra juice drain out so the pie wouldn't be soupy.  I saved this juice to pour over the finished product with ice cream....YUM!


Check out Valerie's Blog for the recipe!  I would definitely recommend trying out this pie crust!

Wednesday, April 11, 2012

Bake 52: Week 15

Take 3 layers of rich chocolate cake, fill & cover them with rich chocolate pudding (and another layer of cake crumbs) and what do you get?
Chocolate Blackout Cake!

I had never seen or tasted this cake, but my-oh-my was it delicious!
It was actually quite easy to make and a forgiving cake too - I don't know about everyone else, but I had a hard time getting the cakes cut in half and staying together.  Luckily I could piece them together and cover them with pudding!  This cake is extremely rich, but delicious!  My kids loved it too, but could only eat a small amount.  I ate way more than I planned, but couldn't resist all of the CHOCOLATE!
I would definitely try this cake again.  I would also just make the pudding by itself, I had never made pudding from scratch and it turned out to be really easy. Check out Courtney's Blog for the recipe!

Wednesday, April 4, 2012

Bake 52: Week 14


Who doesn't love a Tres Leches cake? What is not to love? Cake. Heavy Cream. Sweetened Condensed Milk. More Cream. Oh - and this recipe even has you cook the sweetened condensed milk to make dulce de leche. Ok, you had me at Tres Leches. 
I thought I would be so nice this week and make a gluten-free cake, not only for my husband, but for my sister-in-law who was in town visiting. I was so excited with this recipe and the steps. Somehow, my flour substitution didn't go so well (you never know what you're going to get when you go gluten-free!). My batter was very runny, but I baked it anyway. It did bake up nice and absorb the milk mixture nicely. However, the middle of the cake was super dense and dry. How could it be dry when I poured that much milk on top of it? BUT the edge pieces of the cake were marvelous (especially the next day). For some reason, the cake around the edges turned out perfect and absorbed the milk like it should. Kris and I ate all of the edge pieces (one bite at a time.  How did those bites add up to half a cake?!?) Saturday while we worked on putting in a kitchen floor - it's what got us through! One tip - this cake goes really well with diet coke! (OK, really, what doesn't?) So - I will definitely try this again. I have baked a GF Tres Leches before and it turned out great, I just messed something up on this recipe. Definitely have to do a redo. This recipe was fabulous and I'm glad it was chosen! Check out Amanda's Blog to get the recipe!
My sister-in-law gave it two thumbs up (thumbs get cut off when you use a camera on your phone).  Unfortunately, this was before she actually tasted it. And she got a middle piece.  Sorry Julie!

Wednesday, March 28, 2012

Bake 52: Week 13

Not sure how to explain how excited I was when I saw that this week we would be making
CREME BRULLE!

Excited for a few reasons:
First of all, this is my husband's all-time favorite dessert.  Anytime there is a chance to go to a nice restaurant and order this, he takes full advantage.
Secondly, this is something I would never have thought I could actually make (again, this is for ordering at nice restaurants) so I was excited to try it!
Third, I love Creme Brulle!

It was honestly easier than I thought it would be, and my amazing fried, Talesha, let me borrow her kitchen torch to caramelize the sugar.  I know she's a true fried because she let me use it before she had even tried it! I am definitely ordering one of those for myself now!
 
  Each week I am more and more impressed by this cookbook.  It has "test kitchen" in the title, and these recipes truly are tested and perfected!
So my review of this is that it was absolutely delicious!
My husband's review?  He was expecting "homemade tasting Creme Brulle" but was pleasantly surprised at how good this was! He said it is as good as, if not better than, any he has ever eaten!
Yeah!! A success!  I felt so proud of myself all night and am so excited to be able to make this now!  
Visit Jen's blog to see the recipe!


Saturday, March 24, 2012

Crispy Coconut Chicken Fingers

I had a really rough "mom" day last week.  All I wanted was 10 minutes of quiet, alone time.  When my hubby came home I put myself in a time-out in my room.  Although it was anything but quiet in my house, I was alone.  I knew that if I didn't do something to keep myself busy, I would have fallen asleep immediately!  So I started flipping through recipe books, which is such a stress reliever for me.  This time proved to be productive, as I planned out dinner for the night.  I made these Chicken Fingers with the Seasoned Potato Bites and it was a huge hit with the whole family!  My 8 year old that hates chicken ate several pieces of this and my 6 year old had 4 servings of the potatoes.  My husband always loves anything like a chicken nugget (one of the things he really misses with the gluten allergy) and this was super easy to make gluten free!
Crispy Coconut Chicken Fingers (Adapted From Our Best Bites)
1 1/2 lbs. chicken, cut into bite sized pieces
2 eggs
1 cup cornstarch
1 cup sweetened coconut flakes
1 cup gluten-free bread crumbs (you can make these from your bread, buy them at The Good Earth)
1 1/2 tsp garlic powder
3/4 tsp salt
3/4 tsp curry powder
Preheat oven to 400 degrees.  Chop coconut and mix with bread crumbs and spices.  Place in shallow dish.  Beat the egg and place in another shallow dish, and put the cornstarch in a 3rd dish.  Roll each piece of chicken in the cornstarch, then in the egg, then in the bread crumb mixture until coated.  Place on a cookie sheet lined with sprayed foil. Bake until cooked through, about 20-25 minutes.

Seasoned Potato Bites


Seasoned Potato Bites  (Recipe adapted From Our Best Bites Steak Fries)
10 small red potatoes, washed and cut into bite-sized pieces
2 Tbs olive oil
1/2 tsp cumin
1 tsp chili powder
1 tsp kosher salt
1/2 tsp black pepper
1/2 tsp garlic powder
Toss potatoes in a bowl with the olive oil and spices.  Spray a piece of aluminum foil with non-stick spray and place on cookie sheet.  Spread potatoes out on foil and bake at 400 degrees until tender.  Start checking after 20 minutes.

Easy GF Peanut Butter Cookies


 Luckily Kris really likes peanut butter cookies because they turn out really well without flour! We have a few recipes we use all of the time, but here is one that is just a little bit different that I found on Pinterest.  They were really yummy - I have never added nuts to them and it really made them stand out.

Peanut Butter Cookies (from Kill.The.Gluten)
1 cup peanut butter
3/4 cup sugar
1 egg
1/2 tsp baking soda
1/4 tsp salt
3/4 cup chocolate chips
1/2 cup crushed peanuts (I had pecans and used them and loved it!)
Stir peanut butter, sugar, egg, baking soda, salt until combined.  Add in chocolate chips and nuts.  Roll into small balls and bake on an ungreased cookie sheet at 350 for 12-14 minutes.

Friday, March 23, 2012

Cheesy Garlic Bread Swirls

 I was trying to find an easy bread stick recipe last Sunday and when I came across this one I could not pass up giving it a shot!  What is not to love here?  Garlicy...Cheesy...all rolled up like a cinnamon roll.  Heaven.  Seriously one of the best things I've eaten (especially right out of the oven!)
And surprisingly fairly easy to make! 

Cheesy Garlic Swirls (Our Best Bites)
1 Tbs yeast
1 1/2 cups warm water
1 1/2 Tbs sugar
1 tsp salt
3 Tbs vegetable oil
1 egg yolk  (I was out of eggs, so omitted this and it turned out great!)
4-5 1/2 cups flour, divided
1/2 cup real butter
1 1/2 Tbs garlic bread seasoning (recipe below)
1 1/2 cups mozzarella cheese

1. Combine the yeast, water, and sugar in large mixing bowl and allow to stand 10 minutes or until bubbly.
2. Add salt, vegetable oil and egg yolk and combine.  Add 3 cups flour and mix well until combined.  Add enough remaining flour to make a soft dough that barely sticks to your finer.  Knead, either by hand or in mixer for another 2-3 minutes.  Cover and allow to rise 1 hour.
3. Roll the dough into an 18 X 6 inch rectangle on a surface lightly sprayed with nonstick cooking spray or sprinkled with flour.  Mix softened butter and garlic bread seasoning together. Smear garlic butter over the entire surface of the dough and then sprinkle with cheese.
4. Roll up the dough jelly-roll style and then cut into 12 equal slices.  Place each slice in a muffin tin cup that has been sprayed with nonstick cooking spray.  Cover with a clean cloth.  Preheat oven to 350 degrees and allow rolls to rise while the oven is heating. 
5. When the oven is ready, bake for 18-22 minutes.  Be sure to keep a close eye on these during the last 10 minutes or so - once you notice the cheese getting brown, place a sheet of aluminum foil over the rolls.  This will keep the cheese from burning.  Although it will get pretty brown on top, the insides will be perfectly melted.
Of course I had to double the recipe but they are pretty filling so one recipe actually would have been enough.
Garlic Bread Seasoning (Our Best Bites)
1/2 cup powdered parmesan cheese
2 tsp kosher salt
2 Tbs garlic powder
2 tsp oregano
2 tsp basil
2 tsp marjoram
2 tsp parsley
Shake ingredients together in an airtight container.  Store in the refrigerator for up to 3 months.

Wednesday, March 21, 2012

Bake 52: Week 12

Palmiers!
When I saw this was the pick this week, I had no clue whatsoever we would be making, but quickly opened my book to take a peek.  Cookies.  Without chocolate.  Not sure how I felt about that.
Until I ate one....Mmmmmmm

How could anything with 3 sticks of butter not be good?!?  There were only a few ingredients, but because of the many times of rolling and folding, a perfect, flaky pastry crust was created.  Then rolled in sugar. Again I say Mmmmmm.  Then baked til just crispy.
The dough all ready to cut for cookies.  So pretty and fun!

 I thought I could just eat one.  Didn't happen.  Ate the rest for breakfast the next morning. 
Even better the next day!  
It was so fun to try something new, and something so different!  This was a great recipe! 
  Visit Rebekah's Blog for all the details!

Wednesday, March 14, 2012

Bake 52: Week 11

The recipe for this week was Ciabatta Bread!
  I am pretty sure that if this baking club voted someone out of the club each week, this would DEFINITELY be my week to get kicked out! (If I had made it this long, that is.)  How unappetizing does this look? Seriously?!? This bread took a really long time.  The thing I liked is that it used just a few, simple ingredients.  But there was a lot of rising time.  It was cooked on a baking stone.  The only one I have is a round pizza stone.  So I cut my loaf in half so that both halves would fit on the stone.  Rather than rising up (for the last rise) it rose out...making a very wide, short loaf.  Halfway through baking you take the parchment paper out from under it and flip the bread over to bake on the other side.  I don't know if it was my stone or what, but it burned the bread on the stone side, making a very unpleasant flavor and smell to the bread.  I did manage to eat most of one piece, and the inside was actually quite good.
 The outside was awful though.  I was feeling pretty good that I could finally make the other bread recipes in this book so far, but this one I totally bombed.  I really believe that it was user error. 
If you want to see how the bread should be, and get the recipe, visit Emily's Blog!

Wednesday, March 7, 2012

Bake 52: Week 10

This week's pick was LUNCHBOX BROWNIES!
I knew I would love these because I've never met a brownie I didn't like love! This recipe was unlike any I've baked though because it used unsweetened chocolate, so I was a little worried about them being too bitter.  Once again, this book never leads astray because they were fantastic! The recipe had several variations, I chose the frosted ones - the frosting recipe was just chocolate chips (I opted to use milk chocolate rather than semi-sweet) and a little oil.  It was perfect. 2 ingredients - so simple and so delicious!
And have I mentioned how much I love the foil slings? They came out beautifully!
 I always feel like I am torturing my poor husband when I bake something that smells as irresistible as brownies!  When I noticed that this recipe only called for 2/3 cups of flour, I decided to try to make them gluten-free.  I did a mixture of rice flour and cornstarch (I normally would have blended rice flour and garbanzo bean flour because I love the way that bakes, but uncooked it makes for a very disgusting batter and I NEEDED some yummy brownie batter that day!).  I also added about 1 tsp. of unflavored gelatin and 1Tbs. of light mayo (this really helps the texture to be less crumbly and more moist).  They turned out perfect! I couldn't even tell that they were gluten-free.  SO delicious! And Kris loved them!
 To get the full recipe, visit LIZ'S BLOG!

Tuesday, February 28, 2012

Bake 52: Week 9


This week is my turn to host.  I had such a hard time choosing a recipe because so many of them look so good and I wanted to pick them all!  I finally decided on.....


BABKA!


OK, so my limited  knowledge of Babka came from Seinfeld.  You remember the one, The Dinner Party.  Jerry and Elaine want to take a Chocolate Babka to a dinner party to impress the hosts.  They wait in the bakery, realizing they forgot to take a number, and another member attending the same dinner party purchases the last Chocolate Babka.  Jerry suggests getting a Cinnamon Babka instead, but Elaine feels that the Cinnamon Babka is the "lesser Babka" but he argues that anything with cinnamon is the best.  Well after the LONG wait, they finally purchase the Cinnamon Babka, only to find a hair on it! Classic episode! 
 Anyway, I've always been intrigued as to what Babka really was ever since I saw this.  When I found it in the cookbook I just HAD to pick it - then when I looked at the pictures I was really excited! It is the Cinnamon Babka - and if it is true that this is the "lesser babka", then I figure the chocolate one must be made with unicorn tears or something because I don't know how you beat this!
(Though I am going to have to try to make a chocolate one now because... well, I'll admit that anything with chocolate really is better!)
OK - on to the recipe!

(makes two 9" loaves)
*This dough is very dense and sticky and cannot be kneaded in the food processor or by hand - a standing mixer is necessary.  

DOUGH
1 cup sour cream
3 large eggs
1/4 cup cold water
4 tsp. vanilla extract
5-5 1/2 cups all-purpose flour
1/2 cup granulated sugar 
1 envelope (2 1/4 tsp.) instant or rapid-rise yeast
1 tsp. salt
16 Tbs. (2 sticks) unsalted butter, cut into 1/2" pieces and softened

FILLING
1 1/2 cups packed light or dark brown sugar
8 Tbs. (1 stick) unsalted butter, melted and cooled
1 cup walnuts, toasted and chopped coarse
1 cup raisins (optional)
2 tsp. ground cinnamon
Pinch salt

GLAZE
1 Tbs. granulated sugar
1/4 tsp. ground cinnamon
1 large egg
2 Tbs. water

1. For the dough: Whisk the sour cream, eggs, water, and vanilla together in a large liquid measuring cup. Combine 5 cups of the flour, sugar, yeast, and salt in a standing mixer fitted with the dough hook.  With the mixture on low speed, add the sour cream mixture and mix until the dough comes together, about 2 minutes.

 2. Increase the mixer speed to medium low and knead until the dough is smooth and elastic, about 6 minutes, scraping down the sides of the bowl occasionally. (The dough will be quite sticky)
3. With the mixer on medium-low, slowly add the butter, 1 piece at a time, waiting about 15 seconds between additions.  Scrape down the sides of the bowl and continue to knead the dough on medium-low speed until it forms a very soft ball, about 15 minutes longer.  If after 6 minutes more flour is needed, add the remaining 1/2 cup of flour, 2 Tbs. at a time, until the dough clears the sides of the bowl but sticks to the bottom.
 4. Scrape the dough into a large, lightly oiled bowl, cover with greased plastic wrap, and refrigerate for at least 10 hours or up to 24 hours.  (Because of the high butter content, the dough will rise only slightly.)
 5. For the Filling:  Mix all of the ingredients together; set aside.  Grease two 9X5" loaf pans, then line with parchment paper.
For toasting nuts, the book recommends the following:  To toast a small amount (under 1 cup) of nuts or seeds, put them in a  dry skillet over medium heat.  Simply shake the skillet occasionally to prevent scorching and toast until they are lightly browned and fragrant, 3-8 minutes. Watch the nuts closely because they can go from golden to burnt very quickly.To toast a large quantity of nuts, spread the nuts in a single layer on a rimmed baking sheet and toast in a 350 degree oven, shaking the baking sheet every few minutes until the nuts are lightly browned and fragrant, 5-10 minutes.
The filling. I opted out of using raisins.

6. Turn the cold dough onto a lightly floured counter.  Roll the dough into a 24"X18" rectangle, about 1/16" thick, with the long side facing you.  Sprinkle the filling evenly over the dough, leaving a 1/2" border at the far edge.
 7. Loosen the dough from the counter using a bench scraper, then roll the dough into a tight cylinder, brush the border with water and pinch the seam closed.  Lightly dust the roll with flour and gently stretch the log until 24" in length with an even diameter; pat the ends to even them.  Using a serrated knife, slice the roll into 3/4" thick slices (you shoudl have about 32 slices; don't worry if you have a few less.)
These still had to be cut in half one more time, I got too anxious to take a picture
8. Arrange the slices in 2 long rows in each of the prepared loaf pans.  Mist the loaves with vegetable oil spray, cover loosely with plastic wrap, and let rise at room temperature until nearly doubled in size and the dough barely springs back when poked with a knuckle, 2-2 1/4 hours.


9. For the Glaze:  Adjust an oven rack to the lower-middle position and heat the oven to 450 degrees.  Mix the sugar and cinnamon together in a small bowl. In a separate bowl, beat the egg with the water.  Brush the loaves gently with the egg wash, then sprinkle with the cinnamon sugar.  Place the loaves in the oven, reduce the oven temperature to 350 degrees, and bake until browned, 50-60 minutes, switching and rotating the loaves halfway through baking.  (If the tops of the loaves look like they are getting too dark, tent them loosely with foil.)

10. Cool the breads in the loaf pans for 15 minutes, then remove them from the pans using the parchment and let cool to room temperature, about 2 hours, before serving.

I really loved this! It was a lot like a yummy cinnamon roll made into a loaf of bread.  It says to wait 2 hours before cutting - not going to happen in my house! I pulled it out of the oven at 11:30 at night.  I let it cool about 15 minutes and took a thick slice out of the middle....YUM!  Seriously I was dying at how good it was!  The filling was all gooey and the bread part so soft!  I will definitely make this again - it's not fast, but a fun and impressing thing to take to, yep, you guessed it, a dinner party!